Automatically generate comments for your Julia code with OpenAI.jl and GPT-3
Use large language models to improve your Julia code

Codex is a new general purpose programming language model based on GPT-3 that powers GitHub’s Co-pilot, created by OpenAI. With Codex, developers now have access to robust automatic code generation, verbose documentation creation, programming language translations, and much more. It is worth taking the time to check out the OpenAI API playground to see the wide array of what is possible!
In this tutorial, we will focus on one specific new feature added in the most recent release of GPT-3 and Codex: Edit & Insert. These new features allows us to go beyond basic code generation by inserting new code intentionally into specific parts of a program and also editing the program itself using text commands.

Edit: My Co-author and I are thrilled to share that pre-orders our new book, Julia Crash Course, are now live:
You might also want to check out this video to get a better sense of just how powerful Codex and GPT-3 are:
To take this example even further, we won’t directly edit code but instead take an existing program and use the OpenAI Edit API to add comments for documentation in certain areas of the program. As you can imagine, this is immediately useful for developers who often times forget to add comments when doing their development (imagine you write your code and the IDE is dynamically adding comments as you type) but has ramifications well beyond that simple use case.
Getting Started with the OpenAI API 🧠
In order to get started with the OpenAI API, you will want to head to https://beta.openai.com/signup and create an account. To make use of the API, we will need to leverage an API key to validate requests. If you are unfamiliar with API’s and concepts related to them, you might want to check out this API Glossary.
After you sign up, to get to the API keys, you can select “Personal” in the top right corner and then “View API keys”.

You will be taken to the API Key page which should look like:
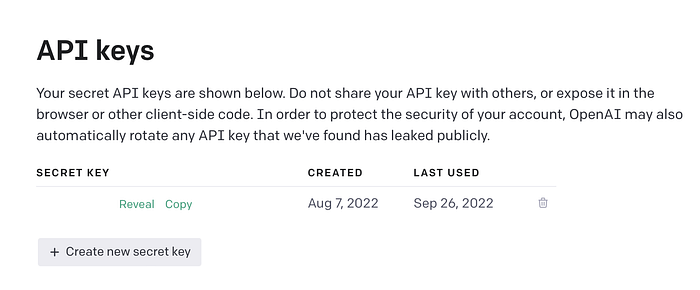
From here, we will copy the Secret Key and use it to authenticate our requests in the section below. Make sure to not share your API key as the OpenAI API does have restrictions and you might be charged money depending on the usage associated with your key.
To read more about authentication and with the API, please head to: https://beta.openai.com/docs/api-reference/authentication
Installing the OpenAI Package 📦
Next, we need to make sure we have the OpenAI package installed. In this tutorial, we will be using Julia (but note that there is also an official Node.js and Python library as well). To setup this project, create a new folder and call it “OpenAI”. Navigate to said folder via the terminal or an IDE.
If you aren’t familiar with installing packages via the Julia REPL, please check out this article:
To add the OpenAI.jl package, enter into the Julia REPL and then type ] to open the package manager. From there, all you need to do is enter:
(@v1.7) pkg> add openaiWe now have the package installed and are ready to go!
Making Our First Request 🥇
Before we look into a more exhaustive example, let’s just send a test request to the API and ensure we have everything setup. In the “OpenAI” folder you created before, make a new file called test_request.jl . Inside that file, add the following code:
using OpenAIlist_models_response = list_models("insert-api-key-here")print(list_models_response.response)
Let’s walk through this code line by line. First, we import the OpenAI package. Then, we call the list_models function and pass in our API key for the request. Last, we take the variable which saved the response from the server and print out the response object.
By default, the server returns a response and status attribute which you can choose to access. Now that we know the API is working, let’s try one of the other API endpoints:
edit_response = create_edit("api-key-here", "text-davinci-edit-001", "Fix the spelling mistakes", input="What day of the wek is it?")print(edit_response.response)
Now we can get into the real magic! We are calling the openai.Edit.create function and passing in a few arguments. The important thing to note is that every function is slightly different but generally take the same parameters. In this case, the create_edit function takes in our API key, the model name, the instruction (which is the human readable text explaining how we want the code / text to be edited), and input (which is the code or text we want to edit). There are also a number of optional parameters but we will get into that more in the latter sections.
Lastly, we print out the entire response from the API followed by a condensed version with just the newly edited text that the OpenAI model generated for us.
Let’s run the code above and check the output:
Dict{String, Any} with 4 entries:
  "choices" => Any[Dict{String, Any}("text"=>"What day of the week is it?\n", "index"=>0)]
  "usage"   => Dict{String, Any}("completion_tokens"=>28, "total_tokens"=>53, "prompt_tokens"=>25)
  "object"  => "edit"
  "created" => 1666731677
Above we can see the response the API returned including information about the API usage it took to return said request.
The cool part is that the original sentence: “What day of the wek is it?” was corrected by the model and returned as “What day of the week is it?”. As you might imagine, this can be immediately useful in many practical applications. Let’s dive deeper into another example!
Taking things up a notch — Let’s document your Julia Code ✍️
Now that we have worked through the basics of using the OpenAI API, we will use the same Edit API to iteratively add comments to an entire program. Here is small sample program that we are going to try to add comments to:
x = Dict("a"=>"A", "b"=>"B", "c"=>"C")

for (key, value) in x
    print(key); print(value)
end
Let’s pass this to the API and then see what the comment the API suggests is:
# Remove new lines and replace them with \n using https://www.gillmeister-software.com/online-tools/text/remove-line-breaks.aspx# for (key, value) in x\nprint(key); print(value)\nendedit_response = create_edit("api-key-here", "text-davinci-edit-001", "Add a comment explaining what this for loop does", input="for (key, value) in x\nprint(key); print(value)\nend")
The first time I ran this, I got:
// Silly example 00\nfor (key, value) in x\nprint(key); print(value)\n end\nWhile interesting, this is not a very useful suggestion from the API. In general, this will happen as you play around with it. The system is not perfect and sometimes takes a few runs to produce relevant results. Let’s run this again and see what we get:
# iterate over key,value pairs\nfor (key, value) in x\nprint(key); print(value)\n end\nThis is much closer to what we actually want!
Let’s try one last example where we can try to get the OpenAI API to document a simple line of code from Flux.jl:
# layer = Conv(weight, bias, sigmoid)response = create_edit("api-key-here", "text-davinci-edit-001", "Add a comment explaining what each argument does in the function call", input="layer = Conv(weight, bias, sigmoid)")
Initially, I got some weird results:
#This creates an object taht contains three parameters\nlayer = Conv(weight, bias, sigmoid)\n# The veritcal size of the output should be n_filters, \n# the horizontal size should be the input size minus the filter size,\n# divided by the stride and plus one.\n\n# layer -> image 1 , weight -> image 2 , bias -> scalar value, stride -> scalar value\n# sigmoid -> flag: if set(1), the activation function is the sigmoid functionlayer = Conv(weight, bias, sigmoid)
The challenge with this API is that it is not trained on Julia code which makes it’s usability somewhat limited. The reality is that if you want to use this in a real world use case with Julia, you need to fine tune GPT-3 to better understand Julia code. I have not had a chance to do this on a large scale but I plan to do so in the coming weeks. You can learn more about fine-tuning in the API docs: https://beta.openai.com/docs/guides/fine-tuning
Other parameters to play around with 🛝
So far in these examples, we have relied on the default API settings. There are three other optional arguments you can play around with in the Edit API:
By setting n in the request, we can specifiy the number of items we want returned. This can be potentially helpful if you were to build a system where you want to give the user the choice of two or more possible edits:
response = create_edit("api-key-here", "text-davinci-edit-001", "Add a comment explaining what this for loop does", input="for (key, value) in x\nprint(key); print(value)\n end", n=2, temperature=0.8)The temperature parameter is a little bit more complicated but let’s break it down so we know exactly what it does. The core idea comes from sampling in language models which you can read more in-depth about in this article. Essentially, the higher the value, the more risky the model will be. If you set it to 1.0 , you can expect that you will get the most risky answers, with 0.0 being the most conservative responses. From experiments that we have done, 0.5–0.6 seems like a good range to be in but you can always modify this on the fly if you are not getting good results.
Lastly, the top_p value is another knob to turn that effects the API results. In this case, the default value is 1.0 and that means it is allowing all results from the “probability mass” to be taken into account. If you were to set this number at .2 for example, that means only the top 20% of items based on the “probability mass” are taken into account.
The API docs note that you should not change the temperature and the top_p value at the same time to ensure you get optimal results. Much of this can be trial and error but making sure you aware of the knobs to turn will be paramount to success building with the API.
Wrapping Things Up + Resources 🎁
In this post, we have walked though setting up an account with the OpenAI API, sent some basic request, and then used the API to document our code. Even though this seems like a lot, we have just scratched the surface of what you can build and use the OpenAI API for! There’s truly a huge amount of flexibly possible and I again encourage you to play around with these examples for inspiration on what you can build: https://beta.openai.com/examples
Before you take off, here’s some other helpful resources you might benefit from as you build:
- OpenAI API Docs: https://beta.openai.com/docs/introduction
- OpenAI Code Editing Guide: https://beta.openai.com/docs/guides/code/editing-code
- GPT-3 Edit Blog Post: https://openai.com/blog/gpt-3-edit-insert/
- OpenAI Twitter: https://twitter.com/OpenAI
- OpenAI Help Center: https://help.openai.com/en/
Happy building!